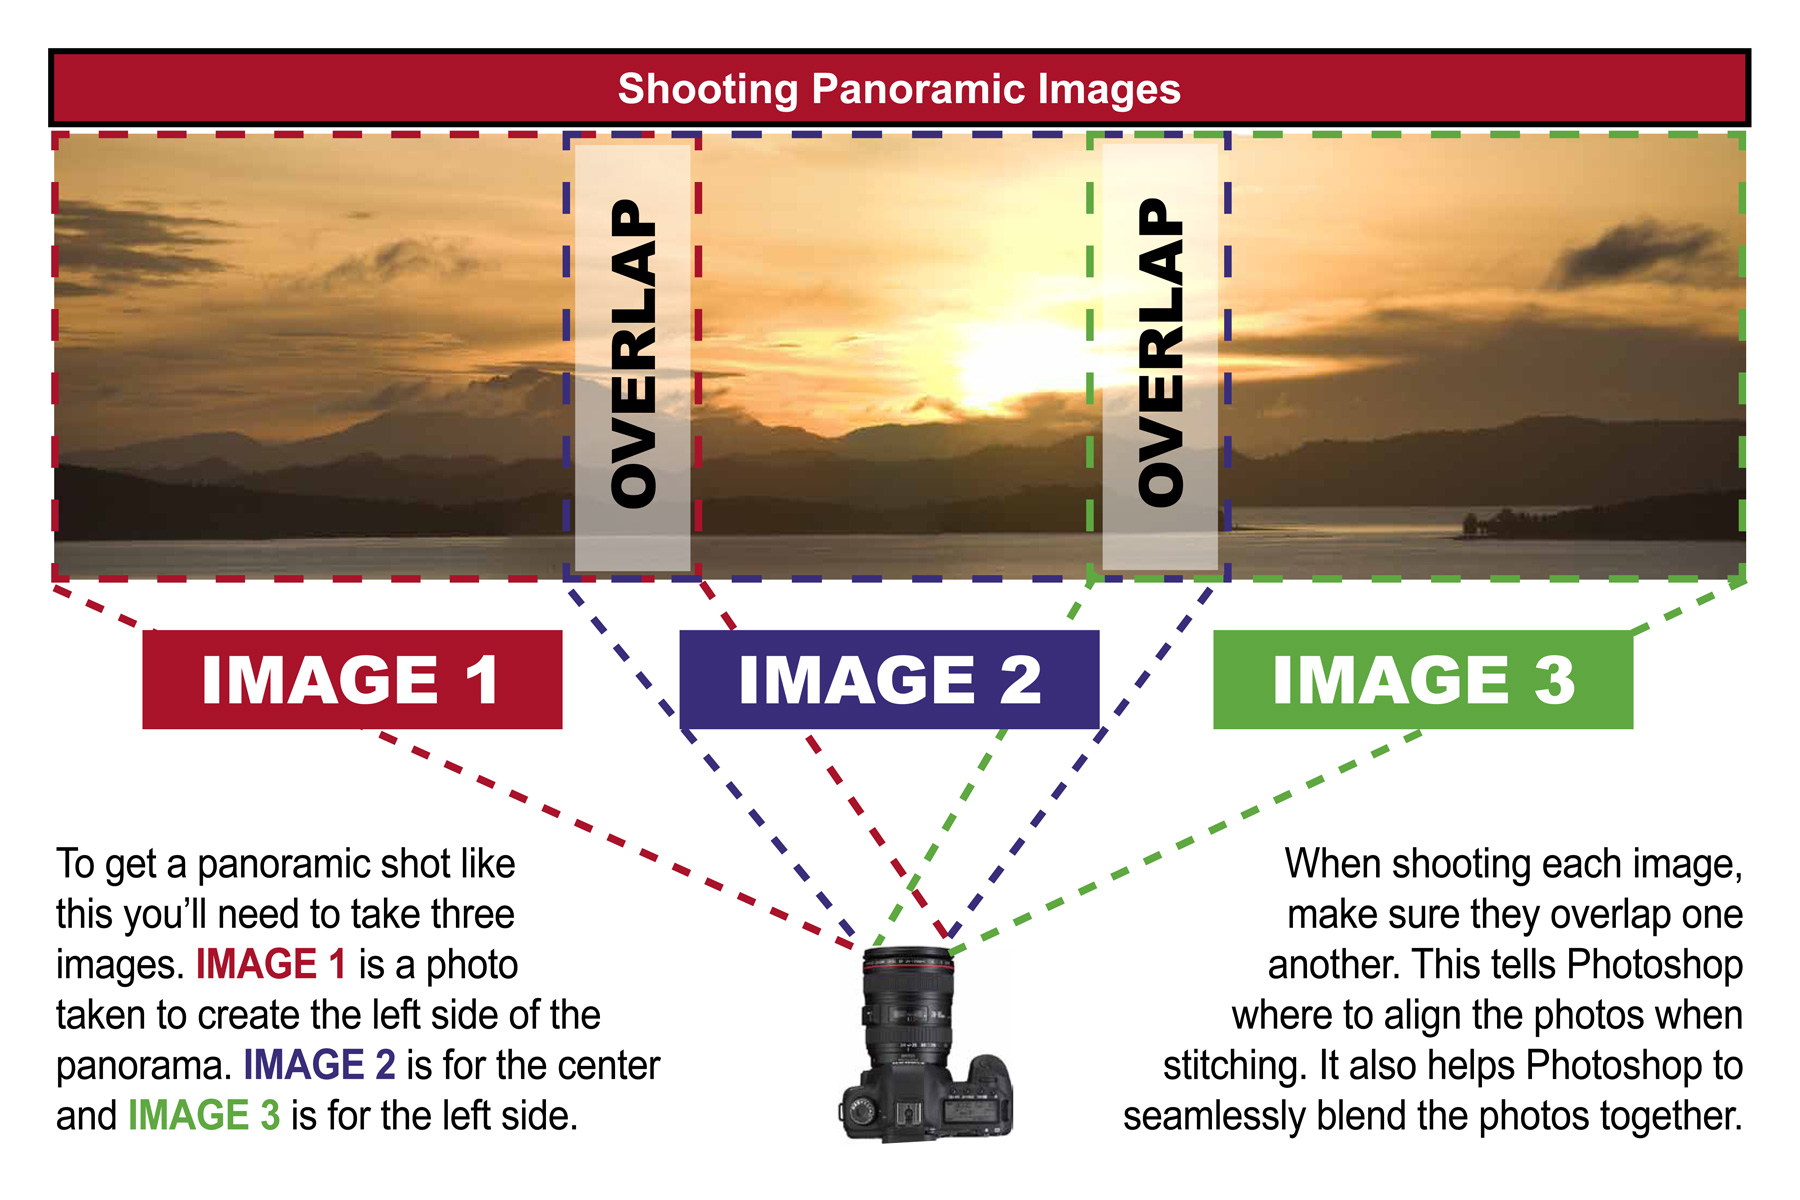
Recently, making out panoramic photos has become much easier as your software stitches them quite beautifully together. Photoshop is quite skillful and master in doing that; it has got a command called Photo Merge that weaves your photos once you hit it. Now, software is mere medium which we use to ease our post works, but keeping some things in mind while taking up the photographs can generate much better outputs.
Always keep your horizon as level as possible throughout as otherwise you will get cropped unaligned images that will pain strake you to aligned them. You can take out possible close landmarks while shooting through your viewfinder, and focusing at that point on each consecutive shot while you move from one to next. This pre-identification will be much helpful as reference points to you.
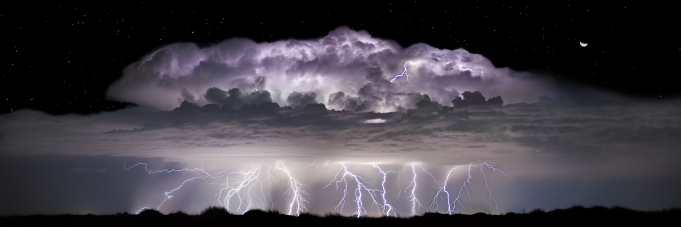
Craig Bill, Texas US
Always set your camera to manual exposure. You don’t want your shots to have exposure level up and down which is inevitable if you set your camera to auto exposure mood. After this, try to shoot frames in vertical and overlap your shot with clean 30% of prior one, as while stitching them together the software is going to try to extract the least distorted part of the image that is quite reasonably the center part.
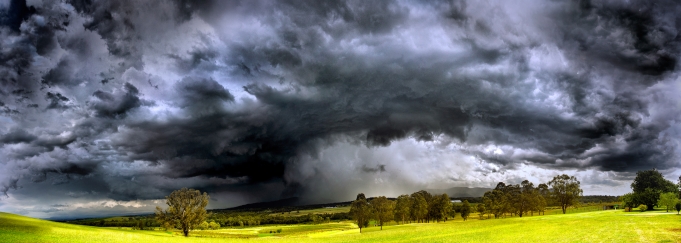
Hunter Valley NSW Australia by Milos Lekovic
Now one another trick you can follow: with auto focus 1st let your camera does a clean focus .As soon it does that flips your focus to manual so that it doesn’t get change to your next consequent clicks. You need to have clean focus on every image you shoot else otherwise your images won’t be uniform inconsistent for panoramas.
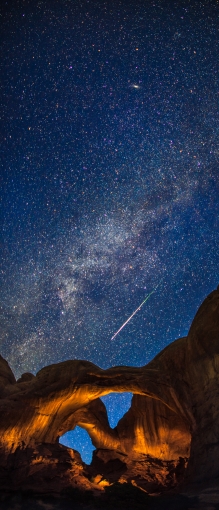
Perseid meteor, Utah by Thomas o’brien
This would be a mandatory thing if you are using a fast lens i.e. wide aperture one. You also need it if you have any important as foreground object or something like that. You will also be affected by parallax effect and use of a tripod would heal you from that.
Tripod also helps you to line up your shot in accurate way and that you overlap your photos properly to make the stitch happen for the panoramas. For say you are using a telephoto lens, a slightest movement in that can change your composition thereby creating a loop hole while making panoramas.
You also get parallax errors while making panoramas and only use of tripod can solve that. To put in simple words, when you have something in your foreground to shoot panoramas the perspective can change badly while changing or rotation your camera position to take up your next shot. This even gets better with the use of wide angle lenses. Though while using any telephoto lenses you don’t see this errors, or very less if present as the distance from your foreground to is not so much affecting.
If you like to make correct shots, you need to use special kind of tripods which will help taking those beautiful mind blowing 360 degree without parallax error and also allow you stitch images flawlessly, without even having wide angle lenses.
Tripod also helps align your image tonal range, when you set to auto bracketing exposure due to inconsistent light like sunrise or sunsets. I will explain that below on 4th point, but do make sure one thing- Tripod is an Inevitable Gear that You can’t Deprive.
Using a Wide Angle lens always distorts your image and you need to make lens corrections to straighten up bent lines, Horizons. This are quite time taking and can be corrected on post processing, but sometime you can be unsuccessful so do be prepared for that. Your panoramic software can heal up more accurately but success rate not always be 100%, so you may need to do some stitching by yourself that is manually to correct this. Same thing counts for shooting at extreme angles- for instance shooting a sky from low perspective can make out extreme angles at corners as your lens is a curved surface and these unnatural angles are reasonable to happen. While you always can join this images to make panoramas but it takes much more time and does take some more skill out of you and may be you need to stitch them manually as said earlier. But if your software can take up the data correctly then you are free to let him stitch else, as said.

Marco Garabello, Italy
Images taken with fast lenses are hard to stitch as they have too much blurry portions, bokehs etc. (out of focus parts). Having complete focus in all places makes you stitch easily. Those blurry images might take some time of yours and need to do some manual stitching as your part.
I generally use Photoshop Panos Stitching for the purpose, its good but it’s also a part of Photoshop so if you have it, just give it a try. Another Open Source Software called Hugin is my favorite too. It gives some pretty stunning results if you have solid foundation of images do give it a try. Some users have complained about its complicacy in using it but like every other software, you need to catch the learning curve. Considering it free software I would definitely recommend you to use it and tell us your experience.
It is very important that you take up some good test shots and tally your exposure settings to get the right one on actual act. Checking out your color histograms will assure you of this too. Once you are done you can grab some mental note then you are free to throw your camera on manual exposure mode while inputting the parameters as recorded on your tests. If you are shooting in auto mode, every time you Pan through to take an image the settings gets altered .Now, when there is a shaded part camera will try to change its settings to get the correct exposure thereby making that area bright vs. the normal bright region. This will make your photos tough to stitch, so why not make life a bit easier in your digital dark room by flipping everything to manual, ensuring everything remains fixed throughout.
There is some software that stitches your images by balancing out the exposure differences on your consecutive shots thus making your shot uniform to stitch. But this is not going to happen on all shots neither does this is a correct way unless you are in complex situation. You don’t always get the guarantee on this way of shooting and that every photo can be stitched, in terms of quality it is always better that you set to manual exposure. Shooting on Manual exposure you get uniform images with uniform exposure and that too without any loss of data.
You may need to auto bracket your photos to avoid blown out highlights, dim shadows that you face in complex lighting situation. By doing this you are using two styles, exposure blending and panoramic shoots. This gives you two or more images having different exposure levels of same composition, thus providing lot more work space while you are on post-production. After you are done stitching you will be having 2-3 separate set of files having different exposures enabling you to exposure blend with high tonal range using different layers.
Quick how-to tutorial
These days taking a panoramic photograph can be as simple as shooting a few frames and turning the camera as you go. Here is a quick tutorial to take panoramic photographs.
1. Hold your camera straight or place it in a tripod in front of the location.
2. Take a photo.
3. Turn and take another photo. It needs to overlap 30%-50%.
4. If you keep your camera over the same point, your panorama will turn out better. Imagine that your camera is on a tripod, and the camera is fixed in one place.
5. Repeat, until you make a full circle. If you want, make another row above or below the first one to get better results.
Conclusion
You can even use photoshop to stitch photos in order to create excellent panoramas. I will discuss about it in future article. Please let me know your views about these tips.
About the author /
Mohamed Rias
Popular


Editor’s Pick
-
April 4, 2023 Master the Art of Object Destructuring: Boost Your JavaScript Skills Today!
JavaScript destructuring is a powerful feature that allows developers to extract values from arrays and objects, and assign them to variables in a more concise and readable way. By using destructuring, you can easily access specific values from complex data structures, such as nested objects or arrays, without having to write lengthy code to traverse…
-
December 15, 2010 35+ Inspiring Nightscape photography and Tips
Nightscape Photography is one of the eluding styles of photography in lines of selection of photography-style by a photographer. It is sometime possible to shoot Landscape panorama, sea views, and bridges at night in such a manner as if, it has been taken at day time. A cityscape at night with lights blazing away like…
-
February 12, 2010 25 Useful Tools for Registering and Monitoring Domain Name
Anything from a company to products, websites to blogs require a good name to have a good impression at the audience. Getting a good name for the site can be really difficult as most of the names are already taken by some one else. This case is especially prominent in the area of website’s domain…
-
September 21, 2009 150+ amazing Photo Manipulations for professional photographers
-
December 2, 2010 45+ Surreal Infrared photography Inspirations and Tips
In Infrared Photography the image sensor used is highly sensitive to infrared wavelengths of light. We all know that white light is composed of several bands of colours known as spectrum and the wavelengths ranging between 750nm to about 1200 nm, falls on infrared (IR) band. The spectrum used is in this technique is termed…
